Generate an AWR Report
How PMP4PG Snapshots Differ from Oracle AWR
In Oracle AWR, a snapshot is a point in time. In PMP4PG, a snapshot is an interval — it has a start time and an end time, covering approximately 30 minutes of activity.
This means:
- A single snapshot already covers a full 30-minute period of database activity
- A report covering multiple snapshots spans from the start of the first snapshot to the end of the last snapshot
- All selected snapshots must be consecutive — no gaps are allowed
Accessing the AWR Viewer
From the Server Detail page, click AWR Viewer for the server you want to analyze.
Step 1 — Select the Report Mode
The snapshot selector offers two modes, toggled with the Simple / Advanced Mode switch:
Simple Mode (default)
Select a single snapshot to analyze. The report covers the 30-minute interval of that snapshot.
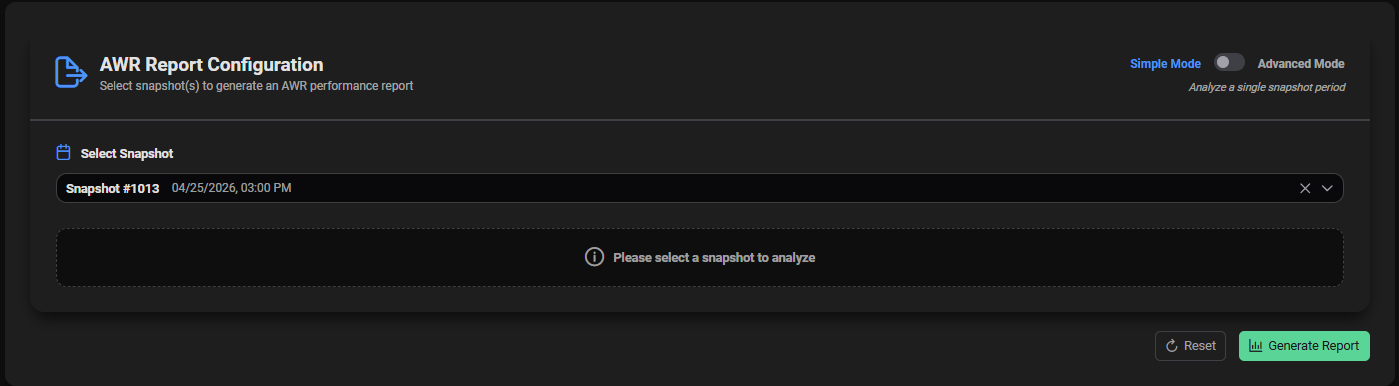
Use Simple Mode when:
- You want to analyze a specific 30-minute window
- You are investigating a known incident period
- You want a quick overview of a recent period
Advanced Mode
Select a Begin Snapshot and an End Snapshot to analyze multiple consecutive snapshots. The report covers from the start of the begin snapshot to the end of the end snapshot.

Use Advanced Mode when:
- You want to analyze a longer period (e.g. peak hours, a full workday)
- You need to compare a workload across several snapshot intervals
In Advanced Mode, all snapshots between the selected begin and end must be consecutive — no gaps allowed. If a gap is detected, the selector displays a warning and the report cannot be generated.
Step 2 — Select the Snapshot(s)
Each snapshot in the dropdown displays:
| Information | Description |
|---|---|
| Snapshot #ID | Sequential snapshot number |
| Duration | Duration of the snapshot interval (e.g. 30min) |
| Start → End | Exact start and end timestamps of the snapshot |
| ASH Samples | Number of ASH samples captured during this interval |
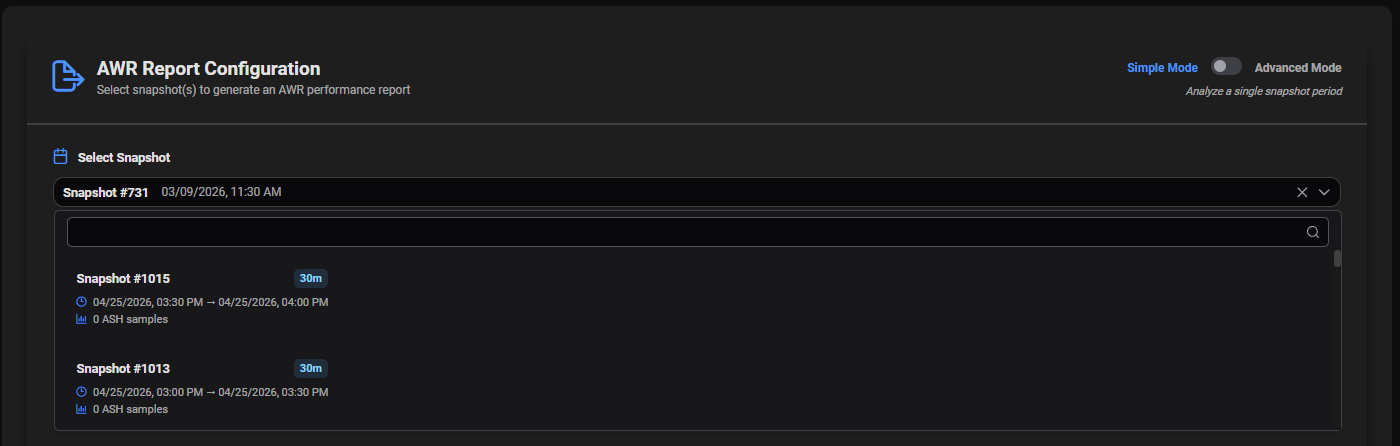
In Advanced Mode, select the Begin Snapshot first. The End Snapshot dropdown is then populated with only the consecutive snapshots available after the selected begin.
Step 3 — Review the Analysis Summary
Once a valid selection is made, an Analysis Period Summary is displayed:
| Field | Description |
|---|---|
| Analysis Period | Start timestamp → End timestamp of the full report period |
| Total Duration | Total time covered by the selected snapshot(s) |
| Snapshots Included | Number of snapshots included in the report |
| Total ASH Samples | Total number of ASH samples available for the period |
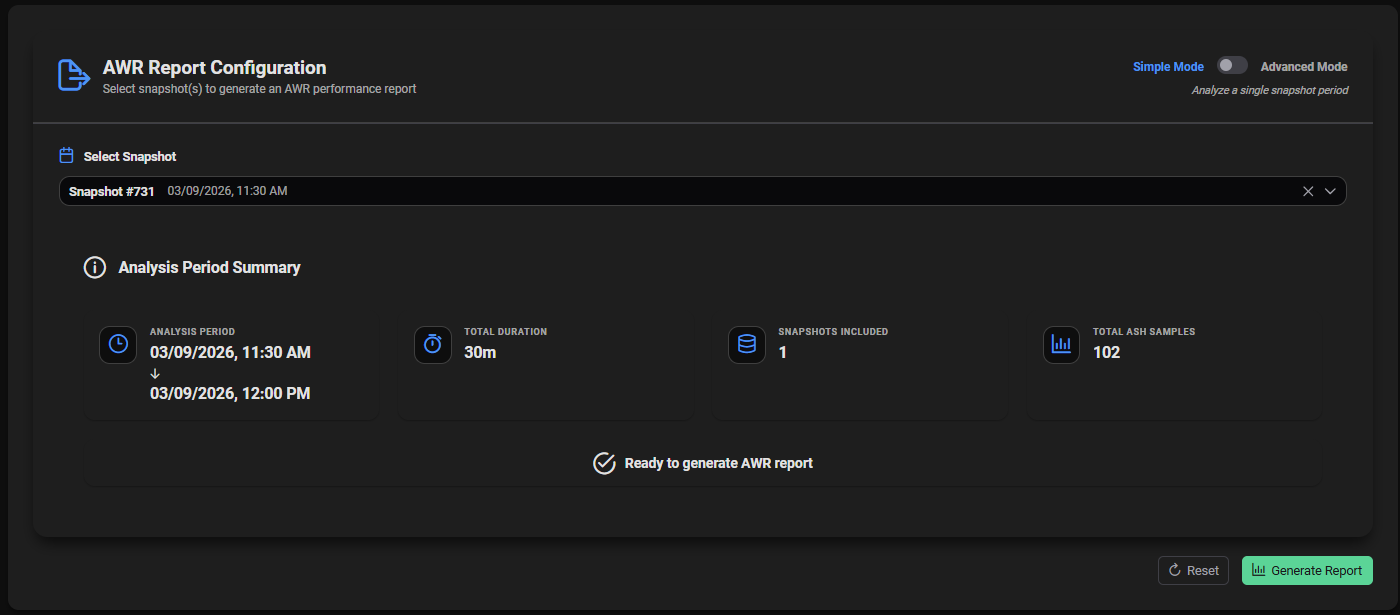
A green "Ready to generate AWR report" badge confirms the selection is valid.
Step 4 — Generate the Report
Click Generate Report. The backend computes all deltas between the selected snapshots and renders the full report.
Report Structure
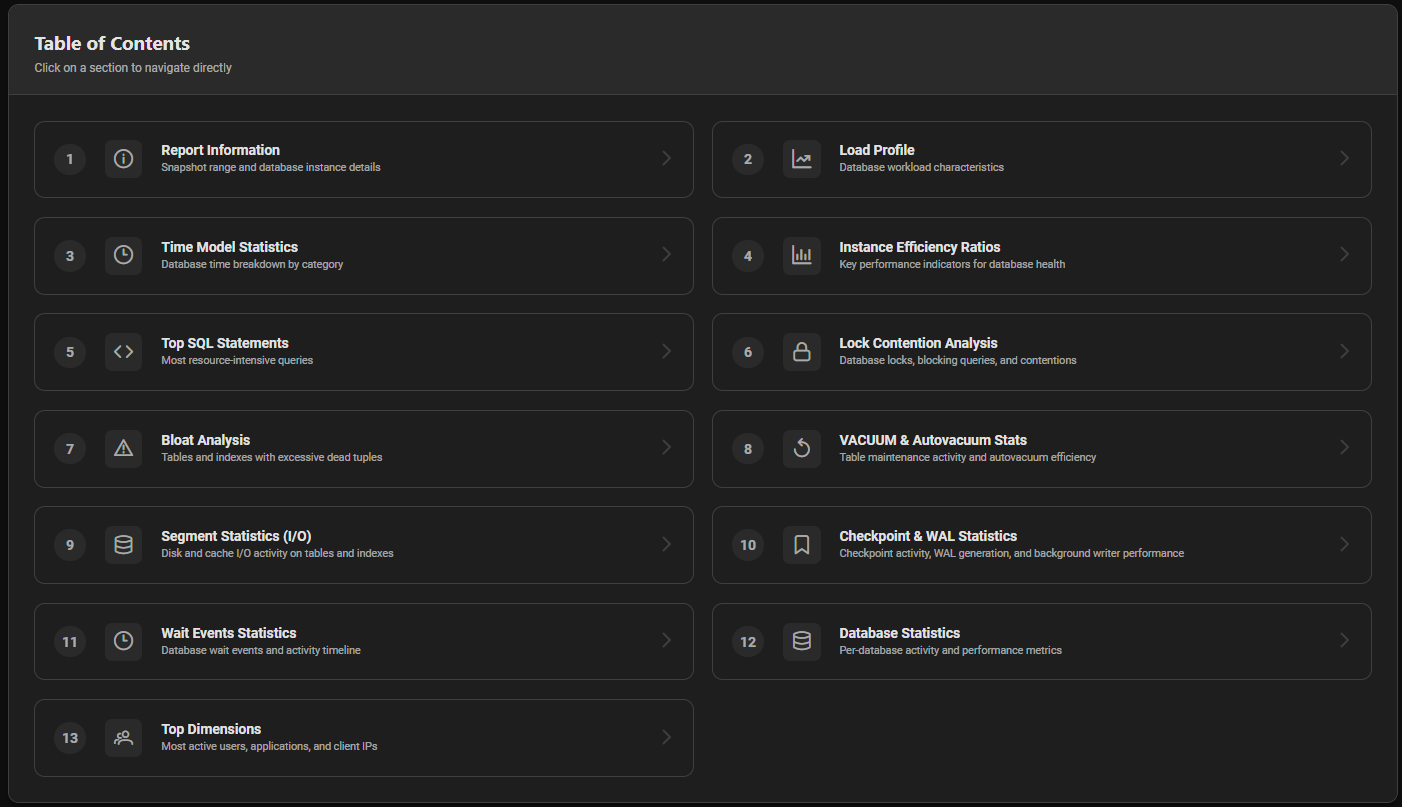
Once generated, the report is displayed on the page with a Table of Contents providing direct navigation links to each section:
| # | Section | Description |
|---|---|---|
| 1 | Report Information | Snapshot range and database instance details |
| 2 | Load Profile | Database workload characteristics |
| 3 | Time Model Statistics | Database time breakdown by category |
| 4 | Instance Efficiency Ratios | Key performance indicators for database health |
| 5 | Top SQL Statements | Most resource-intensive queries |
| 6 | Lock Contention Analysis | Database locks, blocking queries and contentions |
| 7 | Bloat Analysis | Tables and indexes with excessive dead tuples |
| 8 | VACUUM & Autovacuum Stats | Table maintenance activity and autovacuum efficiency |
| 9 | Segment Statistics (I/O) | Disk and cache I/O activity on tables and indexes |
| 10 | Checkpoint & WAL Statistics | Checkpoint activity, WAL generation and bgwriter performance |
| 11 | Wait Events Statistics | Database wait events during the report period |
| 12 | Database Statistics | Per-database activity and performance metrics |
| 13 | Top Dimensions | Most active users, applications and client IPs |
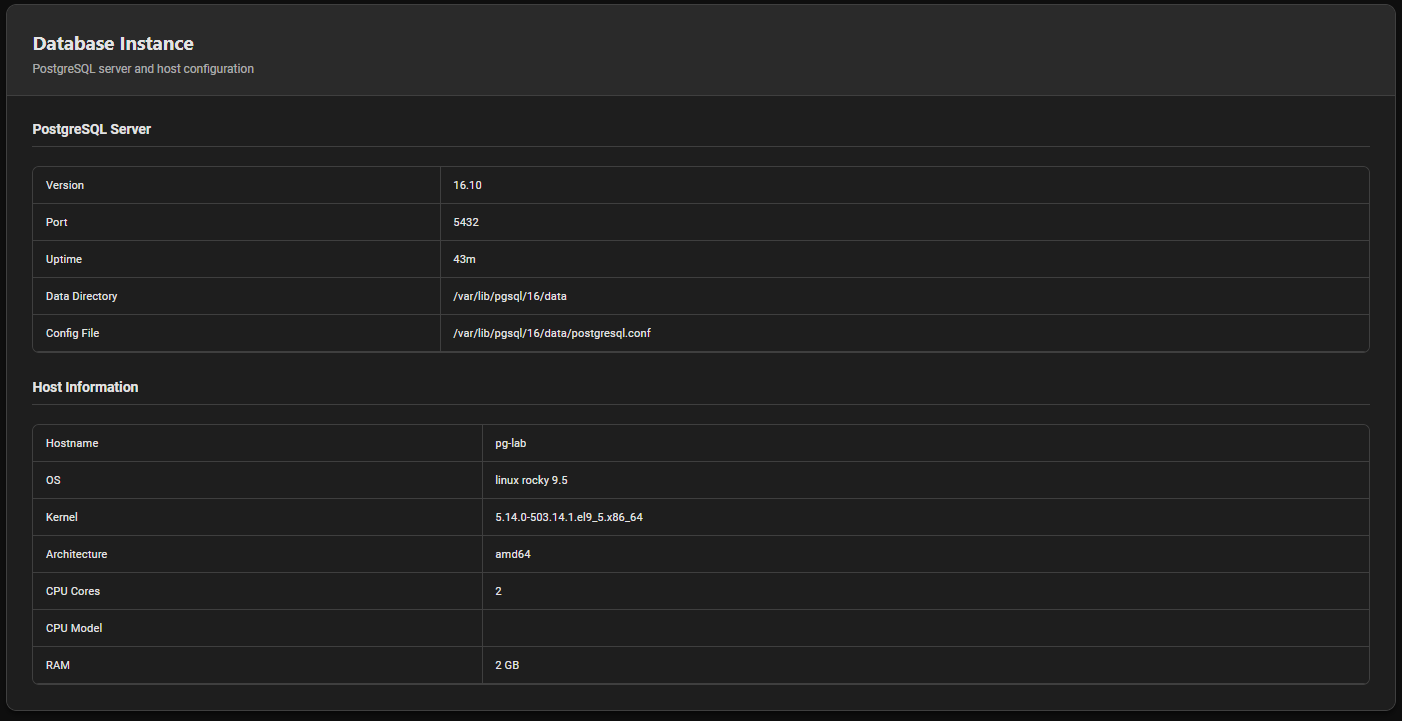
Report Header — Database Instance
The first section of the report displays detailed information about the monitored server:
PostgreSQL Server
| Field | Example |
|---|---|
| Version | PostgreSQL 16.10 |
| Port | 5432 |
| Uptime | 15 days 4h 23min |
| Data Directory | /var/lib/pgsql/16/data |
| Config File | /var/lib/pgsql/16/data/postgresql.conf |
Host Information
| Field | Example |
|---|---|
| Hostname | pg-lab |
| OS | Linux Rocky 9.4 |
| Kernel | 5.14.0-427.xx.el9.x86_64 |
| Architecture | x86_64 |
| CPU Cores | 8 |
| CPU Model | Intel Xeon E5-2670 |
| RAM | 32 GB |
Exporting the Report
Once the report is generated, an Export HTML button appears at the top of the page. Click it to download the full report as a standalone HTML file.
See Export AWR Report → for details.
Actions
| Button | Description |
|---|---|
| Refresh Snapshots | Reload the list of available snapshots from the backend |
| Reset | Clear the current snapshot selection |
| Generate Report | Generate the AWR report for the selected snapshot(s) |
| Export HTML | Download the report as a standalone HTML file (visible after generation) |